Back in 2012 I published a small Windows Store app called PassworWallet which already had a few thousand downloads over the years and when Windows 10 came out the daily 5-10 downloads went up to 15-20, so I thought it's time to release an update, so the last days I updated it to UWP. This post summarizes the update process.
First of all the best resource for the update is here. The approach I followed was that I created a new UWP app project within the solution, copied all the files from the Windows Store app and first worked through all the compilation errors (there weren't too much), then I started the app and looked at the "out of the box" stage and from that point I dropped all the Windows 8 related stuff and implemented more "Windows 10ish" features.
From the beginning I really knew what I want with the app, so here are the requirements of the update:
- The app must support multiple screen sizes (I focused on Phone, Tablet, and Notebook/Desktop PC)
- The MVVM architecture should remain the same (I used MVVM Light, and as it turned out I was able to keep it almost as it is)
- I used the ad framework from Microsoft (the one which was integrated with PubCenter). Something similar should be used for Windows 10
- As a new feature I wanted to implement an In App Purchase (IAP), which enables users to remove all the ads from the app for a small amount of money
Now let's go through this list and see how I solved these tasks.
1. Adaptive UI
From the beginning I wanted to support every possible screen sizes, so I started to learn about Adaptive UI and the new features of the statemanager. If someone has a few years of expereinace with XAML then learning the new stuff won't be a huge deal. Basically the new thing we should learn is that within the VisualStateManager we have to define Setters and States. The States are some predefined properties and if these are true then the state becomes active and every setter within the state will be applied. Here is a sample from the app:
 <VisualStateManager.VisualStateGroups>
     <VisualStateGroup>
         <VisualState x:Name="Mobile">
             <VisualState.Setters>
                 <Setter Target="PageTitle.FontSize" Value="20" />
                 ...
             </VisualState.Setters>
             <VisualState.StateTriggers>
                 <AdaptiveTrigger MinWindowWidth="0"/>
             </VisualState.StateTriggers>
         </VisualState>
         <VisualState x:Name="Tablet">
             <VisualState.Setters>
                 <Setter Target="PageTitle.FontSize" Value="35" />
                 ...
             </VisualState.Setters>
             <VisualState.StateTriggers>
                 <AdaptiveTrigger MinWindowWidth="361"/>
             </VisualState.StateTriggers>
         </VisualState>
         <VisualState x:Name="Desktop">
             <VisualState.Setters>
                 <Setter Target="PageTitle.FontSize" Value="58" />
                 ...
             </VisualState.Setters>
             <VisualState.StateTriggers>
                 <AdaptiveTrigger MinWindowWidth="721"/>
             </VisualState.StateTriggers>
         </VisualState>
     </VisualStateGroup>
 </VisualStateManager.VisualStateGroups>
The other cool thing I used regarding Adaptive UI was the RelativePanel.
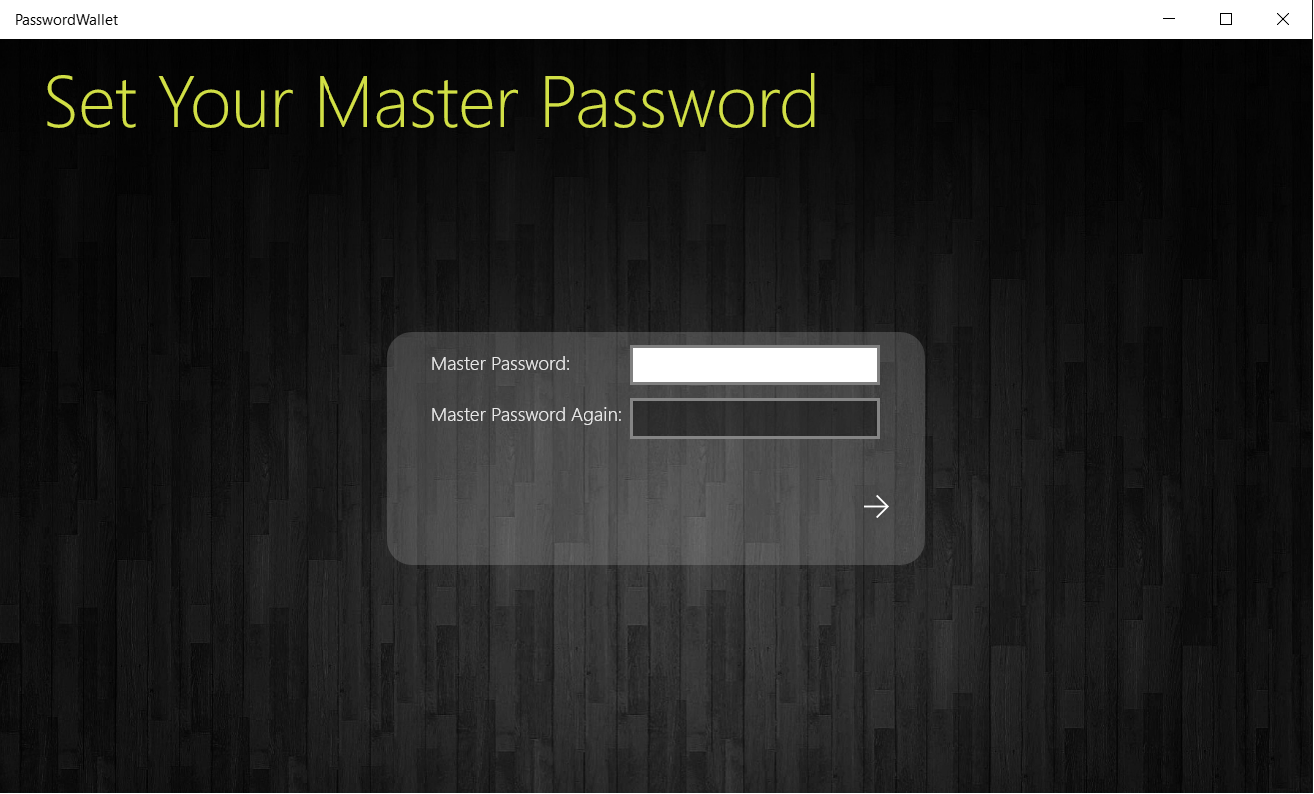
What I did is that for the Desktop View I use a wide view so when the user sets up the master password the texboxes and the texblocks are right next to each other:
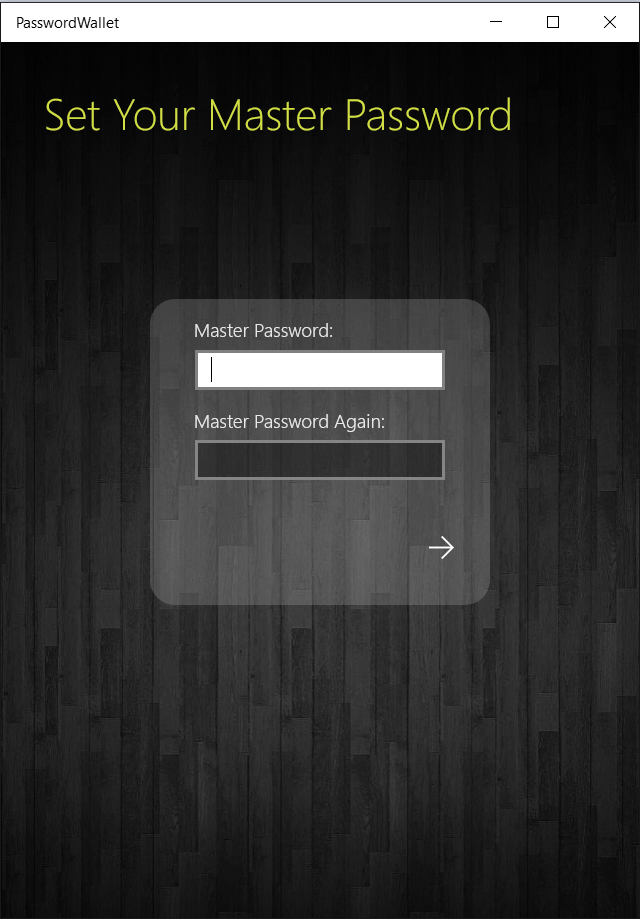
For a Phone and a Tablet this would not be ideal, so instead of the 2 row 2 column construct I use 4 rows:
And all this is in a single control:
<RelativePanel Margin="36,10,36,0" >
    <TextBlock Margin="0,0,0,10" x:Name="MasterPwTextBlock"
               Text="Master Style="{StaticResource BodyTextStyle}"
               Height="20" VerticalAlignment="Top" />
    <PasswordBox  HorizontalAlignment="Right"
               Width="200"
               x:Name="MasterPwTextBox"
               Password="{Binding EnteredMasterPassword, Mode=TwoWay}"  />
    <TextBlock Margin="0,10,5,10" x:Name="MasterPwAgainTextBlock"
               Style="{StaticResource BodyTextStyle}"
               Text="Master Password Again:" />
    <PasswordBox x:Name="MasterPwAgainTextBox" Width="200"
               Password="{Binding EnteredPWAgain, Mode=TwoWay}"/>
</RelativePanel>
Now at this stage what this XAML code renders is a big mess, since there is no ordering of the items. What you need are the RelativePanel attached properties. For every item you can tell where it should go. For example, with RelativePanel.Below="X" you tell that this item goes below the item X.
The most powerful thing is that you can combine RelativePanel with the StateManager and in different states you can have different RelativePanel properties. (For example as you see the in my Sample in the Desktop state the TextBoxes are next to the TextBlocks and in Tablet State they are below them).
To see more look at the documentation here.
2. MVVM in UWP
There is not much to write about it. The old Windows Store NuGet Package of MVVM Light did not work with UWP, but there is an updated one (see this and this). But other than that the code is still the same and the update procedure was also very easy. MVVM still rocks!
3. UWP AdMediator.
In the Pre Windows 10 store(s) the advertising was always an external service. You could use either the Microsoft ad framework or an external ad provider, but if you used the ad service from Microsoft you still had to register on the PubCenter site and manage all ad related stuff external to the store (also the payment was separated from the income of you apps). With the new store and with UWP this is completely changed and became very easy! There is an AdMediatorControl (in the Microsoft.AdMediator.Universal namespace). The only thing you need to do is to drop the control into a view and set the distribution in the Dev Center under Monetization -> Monetize with ads.
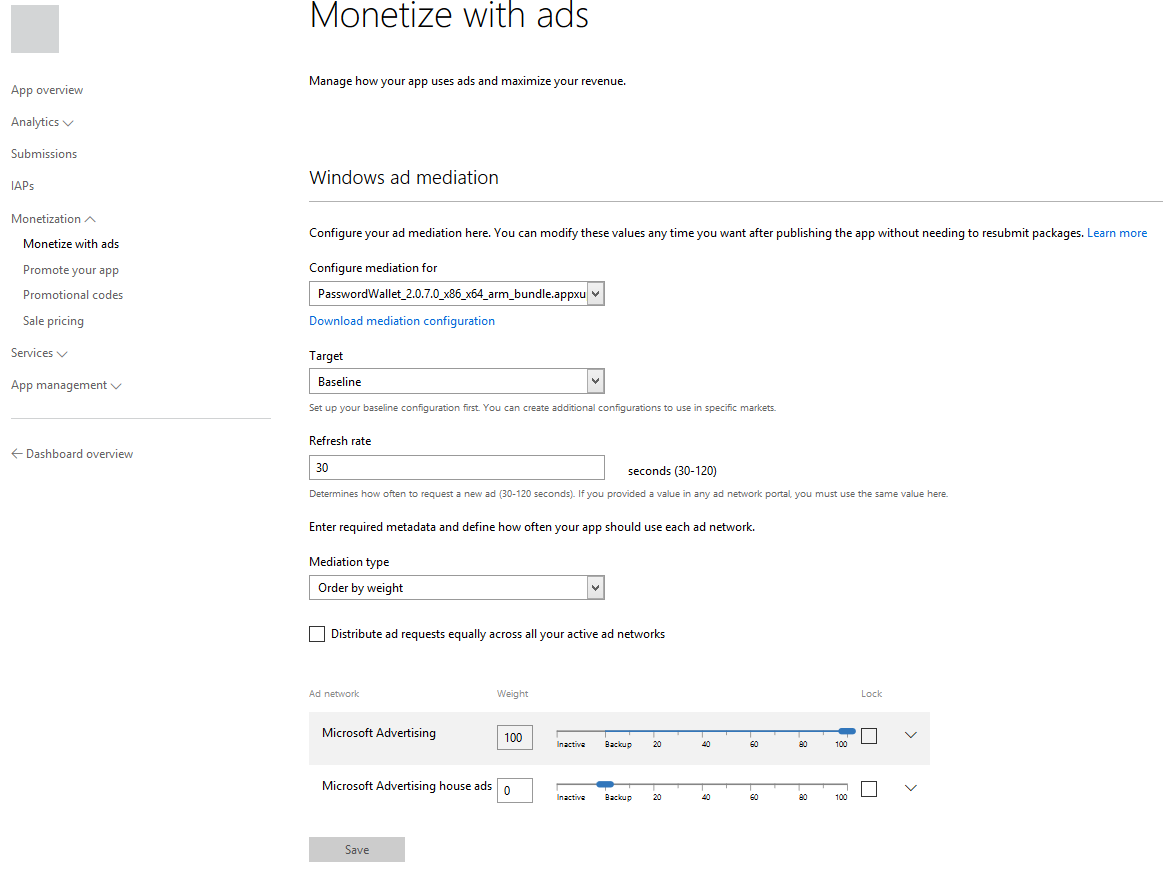
You can find the supported banner sizes here. It also supports ad mediation, so you can have multiple ad providers (not only Microsoft delivering the content). I only use Microsoft, so on the screenshot I set it to 100%, but if you have any additional ad provider you can balance the delivered content between your providers. To add additional providers you just have to click to Project->Add connected service->Ad Mediator in Visual Studio.
Here is a great //BUILD2015 session about this topic.
4. In app purchase (IAP) in UWP
This was also a relatively easy process. You only have to register you IAP in the Dev Center under your app.
The code for buying the IAP is also very easy:
var result = await CurrentApp.RequestProductPurchaseAsync(IAPName);

if (result.Status == ProductPurchaseStatus.Succeeded)
{
   //handle success
}
else
{
  //handle failed purchase
}
To check whether the current user purchased the IAP I do this:
var licenseInformation = CurrentAppSimulator.LicenseInformation;

if (licenseInformation != null
  && licenseInformation.ProductLicenses[IAPName].IsActive)
{
  ...the user purchased the IAP
}
And that's it... I also ran into problems when I wanted to test this. About that I wrote another post here.
+1 C#6
The other thing I was excited about is that with Visual Studio 2015 and UWP I was finally working on a project where I was able to use C#6 features.
One of my favorites is Expression-bodied members:
public class SampleViewModel
{

  public ObservableCollection Items => Model.DomainItemManager.Instance.Items;
  ...
}
Another one if the nameof keyword:
DeleteBtnTouched = new RelayCommand(() =>
{
   Model.DomainItemManager.Instance.RemoveDomainItem(SelectedDomainItem);
   RaisePropertyChanged(nameof(Items));
}, () => SelectedDomainItem != null);
And of course there are other cool thing in C# 6, but there are other great posts on that anyway.
Btw,
